Summary & Trial Objective
Modifying multiple slicing settings in one batch makes root-cause analysis impossible. This guide details how to formulate a single test parameter hypothesis, isolate variables in PrusaSlicer 2.9.6, and document physical evidence before moving forward.
1. Problem Definition and Hypothesis
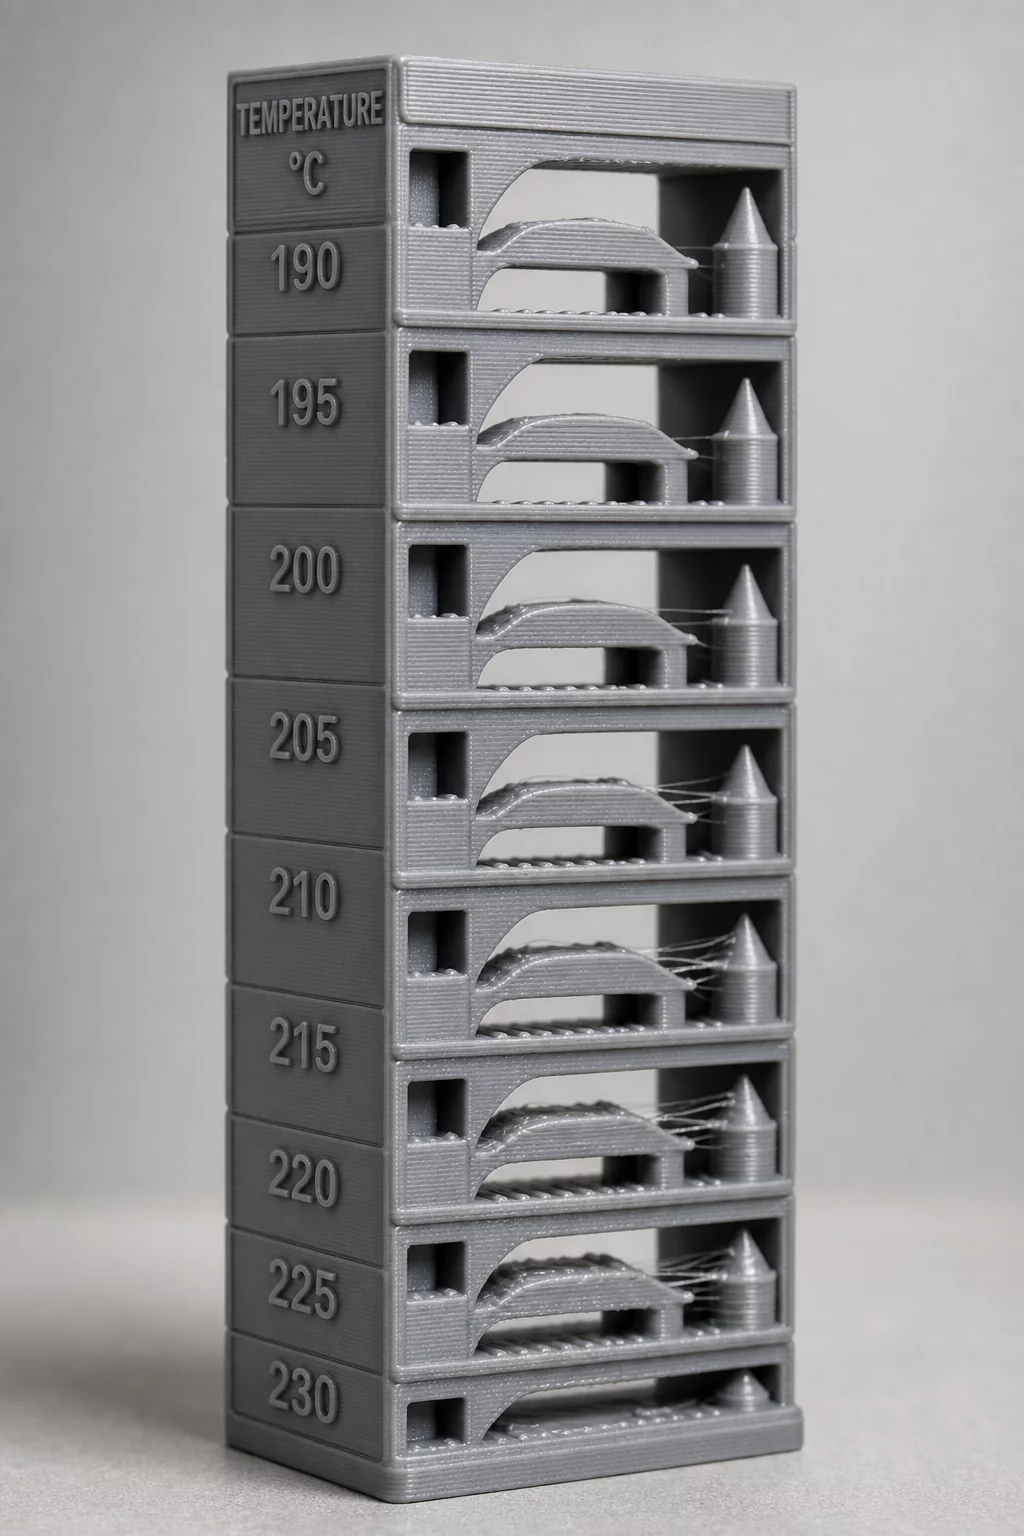
When a prototype fails to seat properly or exhibits surface artifacts, the instinctive reaction is often to modify several parameters simultaneously—lowering extrusion temperature, slowing outer perimeters, and increasing flow rate all at once. If the subsequent part succeeds or fails, you remain unaware of which adjustment caused the outcome. Physical prototyping demands an isolated experimental procedure where each print trial answers exactly one question.
By restricting changes to one independent variable per print cycle, you create an unambiguous correlation between cause and effect. Whether calibrating nozzle temperature on a new PLA blend or tuning horizontal expansion for a tight interference fit, isolating the variable saves filament, prevents compounded errors, and builds an accurate historical ledger for future production runs.
| Trial Variable | Baseline Parameter | Adjusted Variant | Expected Observable |
|---|---|---|---|
| Nozzle Extrusion Temperature | 215 °C |
205 °C (−10 °C) |
Elimination of stringing across 25mm bridge gaps; reduction in minor surface oozing. |
| External Perimeter Speed | 45 mm/s |
25 mm/s (−20 mm/s) |
Sharp corner definition improved; ghosting artifacts eliminated on XY flat surfaces. |
2. Step-by-Step Observation Protocol
Executing an isolated trial requires strict discipline during model slicing and machine setup. Before starting your machine, record the exact baseline state in your PartTrial physical worksheet. Any uncontrolled environmental fluctuation or simultaneous setting change invalidates the test run.
- Lock All Secondary Parameters: Keep ambient enclosure conditions, bed temperature, layer height, and print speed profiles completely identical between runs.
- Apply a Singular Discrete Value: Change only one setting in PrusaSlicer (such as adjusting bridge flow ratio from 0.95 to 0.90) and re-export the G-code with a designated trial specimen ID.
- Measure and Compare Under Identical Lighting: Inspect the printed feature with digital calipers and standard task lighting, recording observable deviations directly into your observation log.
Golden Principle
One print. One question. One observable result. Do not alter secondary parameters until the primary feature is validated against physical thresholds.
3. Evaluation Criteria and Thresholds
Establishing objective pass/fail criteria prior to heating the nozzle ensures clear evaluation. For fit trials, define the exact acceptable tolerance band (such as ±0.05 mm clearance with smooth sliding friction). For thermal trials, inspect bridging droop and layer shear strength. If the observable result meets the specified threshold, validate the setting and move to the next parameter. Otherwise, revert or step the variable in single discrete increments.
Field Observations & Logs
The systematic worksheet approach completely eliminated guesswork on our snap-fit latch trial. Documenting one variable per run prevented us from wasting an entire spool on failed dimension calibrations.
Isolating the line width variable while keeping seam position fixed confirmed that wall expansion was the single driver of our clearance issues.
Submit Field Log Entry